Voice amplification equipment/microphones are available in select classrooms particularly in large lecture halls and classrooms where it could be more difficult to hear the instructor at the front of the room.
The Microphones will be located at or near the instructor station, sometimes inside a drawer. There are three types of microphones installed in classrooms: lectern/table, wired, and wireless. In addition, wireless microphones may be battery-operated, handheld, or rechargeable.
For most types of microphones, the volume is optimized for the classroom and is not user adjustable. The projection system “Audio Mute” and volume controls do not affect most microphones, but there may be a volume control on some wired microphones that are tethered to a PA speaker or microphone connection at the instructor podium.
|
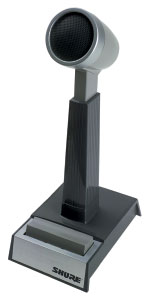
Lectern/table microphones:
- Use the button near the base of the microphone to unmute or turn on the microphone. Some table microphones remain unmuted only as long as the button is pressed. These types of microphones are mostly found in video conferencing capable rooms.
|
|
|
Wired microphones:
- Make sure the microphone is plugged into the microphone jack or portable PA system/speaker. In most rooms the connection is not accessible therefore it is always plugged in.
- If available, make sure the switch on the corded microphone is switched to “on” and adjust the volume using the controls on the cord.
- IMPORTANT: return the microphone/system to the instructor station area after use.
|
|
|
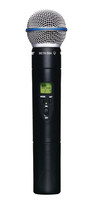
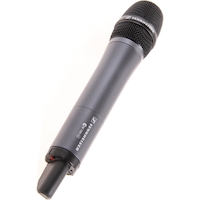
Wireless microphones (handheld):
- Turn on the microphone using the on/off switch. The switch may be on the side or bottom of the microphone. (For some models, you need to press and hold the power button for a few seconds.)
- If the microphone does not work, try changing the batteries.
- IMPORTANT: turn off the microphone when finished and return it to the instructor’s station. Some models sit back into a charging cradle, please return the microphones to the charger so they will be ready for the next instructor.
|
|
|
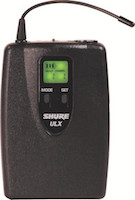
Wireless microphones (battery-operated, lapel-style):
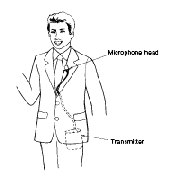
- Clip the microphone about three inches below your chin. Since volume is not adjustable, move the microphone to achieve increased or decreased volume levels.
- Turn on the microphone. (For some models, you need to press and hold the power button for a few seconds.) On some beltpack transmitters the power button is located inside the battery compartment on the front of the pack. Some have the Power switch on the top.
- If the microphone does not work, first try changing the batteries.
- IMPORTANT: turn off the microphone when finished and return it to the instructor’s station.
|
|
|
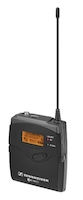
Rechargeable wireless microphones
- Locate the microphone in the charging base at the instructor station. The charging base may be in a drawer.
- Remove the microphone from the charging base and clip it to your shirt, about 3 inches below your chin.
- IMPORTANT: Please remember to return the microphone to the charging base. It will push down into the base and then a red light will turn on to indicate it's charging status.
- We also provide a spare rechargeable battery in the even the microphone was not placed back into the charger all the way.
|

 2500 California Plaza